Key takeaways
- A help desk checklist covers 12 steps: scope, channels, software, roles, ticket labels, routing, SLAs, self-service, ticket records, a test run, a daily routine and a feedback loop.
- Decide categories, priorities and statuses before launch. Routing, SLA timers and reports all depend on them.
- Every ticket needs one named owner and a time attached. A shared queue is not an owner.
- Run a dry run with real questions before go-live, then repeat a short daily, weekly and monthly check.
Most help desks start as a shared mailbox and good intentions. Then volume grows, a ticket sits for two days, and nobody can say who owned it. This help desk checklist gives you 12 steps in the order you need them: plan the desk, set it up, then launch it and keep it running.
It works for customer support teams and for internal IT desks. The overview table shows which steps apply to which. Each step ends in items you can tick off, and there are two extra checklists for what every ticket should record and what to check every day, week and month.
Download the free help desk checklist template
What a help desk checklist is and who needs one
A help desk checklist is an ordered list of the decisions, settings and habits a help desk needs to receive requests, turn them into tickets and resolve them on time. It replaces memory with a list you can tick, so new agents, new channels and busy weeks don’t change how tickets are handled.
Three groups use it:
- Support leads and founders setting up a help desk for the first time or replacing a shared mailbox.
- IT managers who run an internal desk for staff, devices and access requests.
- Agents and new hires, who use the same list as an onboarding guide.
A customer help desk answers questions about orders, accounts and products. An IT help desk handles access and equipment for employees. The steps below are the same; the examples differ. If you’re unsure which one you run, the help desk vs service desk comparison settles it. For the reasons behind each step, read help desk best practices.
The 12-step help desk checklist
A complete help desk checklist covers scope, channels, software, roles, ticket labels, routing, SLAs, self-service, ticket records, a test run, a routine and feedback. The 12 steps fall into three phases: steps 1 to 3 plan the desk, steps 4 to 8 set it up, and steps 9 to 12 launch it and keep it healthy.
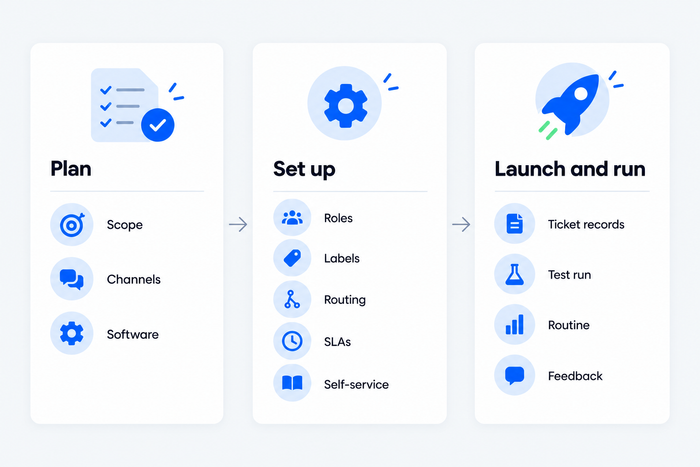
| # | Step | Done when | Fits |
|---|---|---|---|
| 1 | Define scope and request types | You can list what the desk handles and what it refuses | Both |
| 2 | Choose channels and hours | Each channel has an owner and a published schedule | Both |
| 3 | Pick software against requirements | One tool meets every must-have | Both |
| 4 | Set roles, permissions and departments | Nobody has more access than the job needs | Both |
| 5 | Agree on categories, priorities and statuses | Every ticket carries the same three labels | Both |
| 6 | Set routing and assignment rules | No ticket waits for a volunteer | Both |
| 7 | Set SLA targets and escalation paths | Each priority has a time and a next person | Both |
| 8 | Build self-service and reply templates | Top 10 questions have an answer | Both |
| 9 | Write the ticket documentation standard | Any agent can pick up any ticket | Both |
| 10 | Test before go-live | A dry run passes with real questions | Both |
| 11 | Run the daily, weekly and monthly routine | The routine is on the calendar | Both |
| 12 | Collect feedback and review metrics | You review the same numbers every month | Customer support leads, IT managers |
Phase 1: Plan your help desk
1. Define scope and request types
Write down who the help desk serves and which requests it handles. A customer desk might cover orders, returns and billing. An IT desk might cover password resets, new devices and software access.
Scope keeps work that belongs elsewhere out of the queue, and it shows how many agents you need.
Checklist:
- List the groups you serve: customers, employees, partners.
- List the 10 most common request types from the last 30 days of email and chat.
- Mark what you do not handle, such as sales questions or hardware repairs, and where to send them.
- Name one person accountable for the help desk.
Example: A 6-agent online store lists order status, returns, damaged items and billing. Wholesale enquiries go to the sales inbox.
2. Choose channels and hours
Pick the channels you will answer on and the hours you will answer in. Email and live chat cover most small teams. Add Messenger, Instagram or WhatsApp when customers already write there.
A channel nobody watches is worse than no channel, because customers assume someone will reply.
Checklist:
- Choose channels from where customers contact you today.
- Assign a named owner to each channel.
- Set business hours in the right time zone and say whether weekends are covered.
- Write an out-of-hours message that states when the next reply will arrive.
Example: “We reply to chat from 9am to 6pm ET, Monday to Friday. Leave a message and we’ll answer by 11am the next working day.”
3. Pick software against a requirements list
Choose the help desk software only after you have a requirements list. Mark each item as a must-have or a nice-to-have, then trial two or three tools with real tickets.
Switching later means migrating tickets and retraining agents, so a wrong pick costs more than its price.
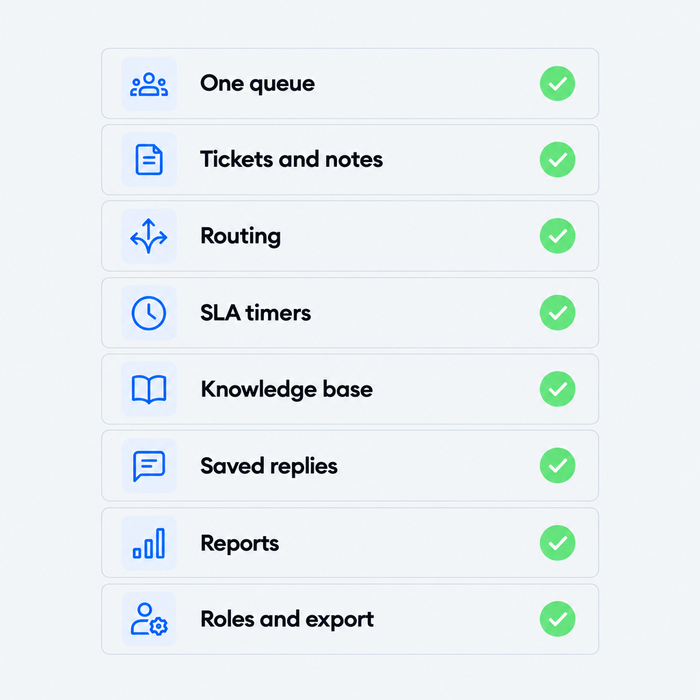
Checklist (help desk software requirements):
- One shared inbox for email and chat, plus any social channel you use.
- Tickets with status, priority, assignee and internal notes.
- Routing or automatic assignment.
- SLA timers and alerts.
- A knowledge base and saved replies.
- Reports on response time, resolution time and satisfaction.
- Roles and permissions, and an export of your data.
- Pricing that fits your agent count and monthly ticket volume.
Start your shortlist with help desk software for small business or the wider helpdesk software comparison.
Phase 2: Set up your help desk
4. Set roles, permissions and departments
Give each person a role that matches the job, and group agents into departments by the requests they handle. An agent who answers chats doesn’t need access to billing settings or contact exports.
Clear roles also settle who escalates to whom.
Checklist:
- Define three roles: agent, supervisor and admin.
- Restrict access to settings, exports and deletion to admins.
- Create a department for each major request type, such as billing or technical.
- Add every agent to one department at least, and name a backup for each.
- Remove access the day someone leaves the team.
Example: Billing tickets go to a billing department of two agents. A supervisor can reassign, but only the admin can export customer data.
5. Agree on categories, priorities and statuses
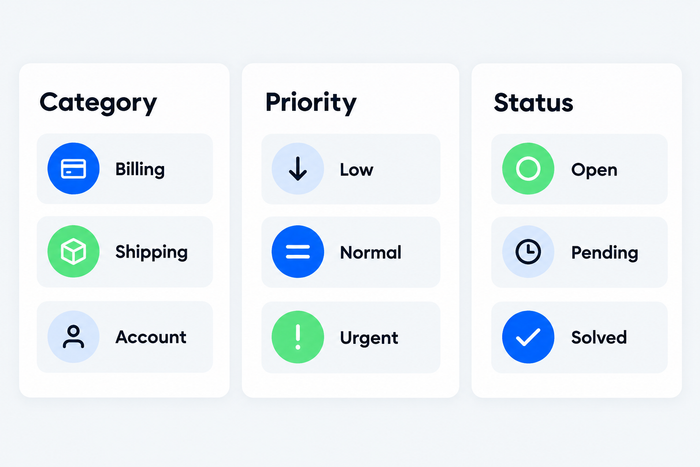
Define the labels every ticket carries before the first ticket arrives. A category names the topic, a priority sets the urgency and a status shows progress.
Routing, SLA timers and reports all read these labels. One agent writing “billing” and another “payments” is enough to break them.
Checklist:
- Keep categories to 6 to 10, and map each to a department.
- Use three priorities, low, normal and urgent, and define each in one sentence.
- Use three statuses: open, pending (waiting for the customer) and solved.
- Review the category list after a month and merge the ones nobody uses.
Example: Urgent means the customer can’t pay or log in. A late parcel is normal. A question about gift wrapping is low. Ticket tagging explains how to extend the labels with tags.
6. Set routing and assignment rules
Let rules decide who gets a ticket: by category, language, channel or in rotation. Agents shouldn’t browse the queue and choose.
Late replies usually trace back to a ticket nobody owns.
Checklist:
- Route each category to its department.
- Use round robin or load balancing for general requests, with a cap on open tickets per agent.
- Name a backup for urgent tickets whenever the owner is away.
- Check the unassigned queue at the start of every shift.
Example: Rule: if a message mentions “refund” or “chargeback”, assign to Maria and set priority to urgent. Everything else goes to the next agent in rotation. See automated ticket routing and ticket triage for more rules.
7. Set SLA targets and escalation paths
A service level agreement (SLA) is the time you commit to for a first reply and for a resolution. Set one target per priority, then write who takes a ticket next when it can’t be solved at the first level.
A customer who hears nothing assumes nobody is working on it. A target gives the team a clock, and an escalation path stops a hard ticket from bouncing.
Checklist:
- Set a first reply target for each priority, such as 1 hour for urgent and 1 working day for low.
- Set an alert that fires before the target is breached.
- Define levels: first line, specialist, manager or engineer.
- Write the triggers: a missing permission, an SLA about to break, a customer asking for a manager.
- Hand over with a note that holds the problem, what was tried and what the customer expects.
Example: “Passed to Dan (payments). The customer was charged twice on order 4821, both charges are confirmed, and she expects a refund confirmation today.” The ticket escalation guide has a sample matrix.
8. Build self-service and reply templates
Write short answers to your most common questions and publish them where customers look first. Save the replies agents type most as templates, and let an AI agent handle the questions with a stable answer.
Every question an article answers is a ticket that never exists. Gartner found in 2024 that only 14% of customer service issues are fully resolved in self-service[1], so most teams have room to improve.
Checklist:
- Write one article for each of your top 10 ticket topics.
- Start each article with the answer, then the steps.
- Save the 10 replies you type most, with placeholders for name and order number.
- Give the AI agent approved sources only, and list topics it must never handle alone, such as billing disputes.
- Make the AI agent hand over to a person, with the history, when the customer asks for one.
Example: “Hi (Customer name), thanks for your patience. Your order (Order number) left our warehouse today. Here is the tracking link: (Link).” Start from canned responses, help desk templates and the AI knowledge base guide.
Phase 3: Launch and run your help desk
9. Write the ticket documentation standard
Decide what every ticket must record, and make that list the same for everyone. The full list is in the help desk ticket documentation checklist below.
A ticket anyone can pick up without asking the customer again is the clearest sign your documentation works.
Checklist:
- Agree the minimum fields: requester, channel, category, priority, summary, owner, status.
- Require a note on every handoff, ending with the next step and the owner.
- Record the resolution in one sentence, and link the article you used.
- Review five tickets per agent each week against the standard.
10. Test before go-live
Run a dry run before real customers arrive. Send test tickets through every channel and check that they land in the right queue with the right owner.
Most launch problems are small and visible in a test: a rule that never fires, a missing out-of-hours message, an AI answer that is wrong.
Checklist:
- Send one test message through each channel and confirm it becomes a ticket.
- Test a refund request, an urgent request and a request you do not handle.
- Ask the AI agent your 20 most common questions and fix every wrong answer.
- Confirm SLA timers start, alerts reach the right person and the satisfaction survey is sent.
- Ask someone outside the team to try the contact form.
Example: A test message that says “refund” should reach Maria, carry the urgent label and show an SLA timer within a minute.
11. Run the daily, weekly and monthly routine
A help desk stays healthy through short, regular checks. Put them on the calendar and give each one an owner. The routine table below lists them.
Checklist:
- Add a 10-minute check at the start of each shift for unassigned and at-risk tickets.
- Hold one 20-minute weekly review of breaches, backlog and sampled tickets.
- Set a monthly review of metrics, categories, templates and access.
12. Collect feedback and review metrics
Ask for a rating when a ticket is solved, and review a few numbers on the same day every month. Read a handful of tickets alongside the numbers, because averages hide problems and feedback explains them.
Checklist:
- Send a one-question satisfaction survey the moment a ticket is solved.
- Track first response time, resolution time, first contact resolution, backlog and CSAT.
- Change one thing a month, then check the same metric again.
- Share the results with the team, including the bad ones.
Example: CSAT drops from 92% to 86% in a week. Every low rating mentions the new carrier, so the team adds a delay notice to the order page. The customer service metrics guide has the formulas.
Help desk ticket documentation checklist
Every ticket should hold enough detail for a different agent to continue it without asking the customer to repeat anything. Use this list as the minimum record for customer and IT tickets.
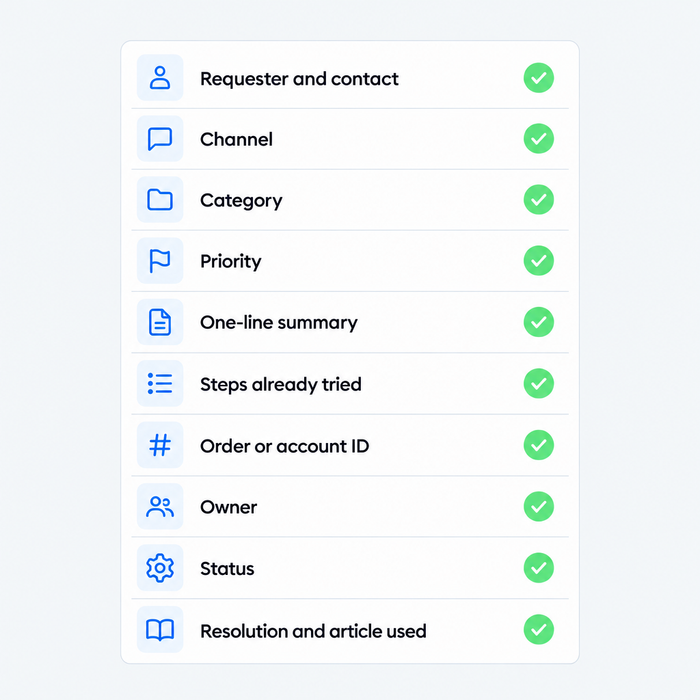
- Requester and contact: name, email or phone, and the account they belong to.
- Channel: where the request arrived, so replies go back the same way.
- Category and priority: the two labels from step 5.
- One-line summary: what the customer wants, in their words.
- Steps already tried: by the customer and by the agent, so nobody repeats them.
- Order or account ID: and screenshots, error messages or device details for IT tickets.
- Owner: one name, always.
- Status: open, pending or solved, kept current.
- Internal notes: each handoff, decision and next step, kept apart from customer replies.
- Resolution: one sentence on the fix, plus the knowledge base article you linked.
Daily, weekly and monthly help desk checklist
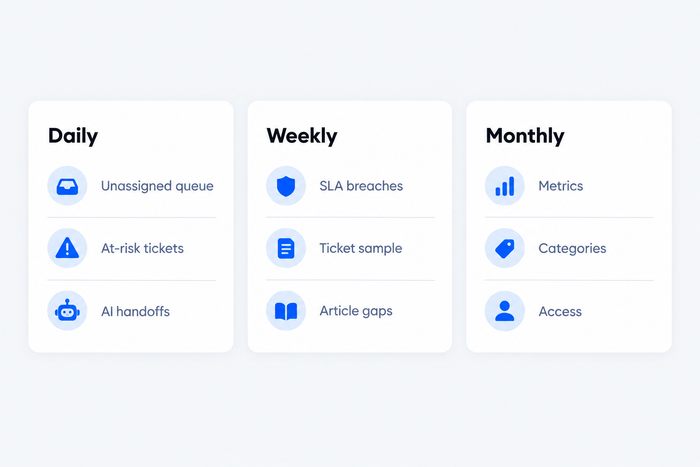
A short routine keeps the setup from drifting. Daily checks catch tickets at risk, weekly checks find causes, and monthly checks keep the system itself up to date.
| When | Check | Owner |
|---|---|---|
| Daily | Clear the unassigned queue and confirm every ticket has an owner | Supervisor |
| Daily | Review tickets close to an SLA breach and reply to pending tickets older than a day | Agents |
| Daily | Read the AI agent handoffs from overnight and note new repeat questions | Supervisor |
| Weekly | Review SLA breaches and fix the cause, not the agent | Supervisor |
| Weekly | Read five tickets per agent against the documentation standard | Supervisor |
| Weekly | Add or fix knowledge base articles for the questions agents answered most | Agents |
| Monthly | Review first response time, resolution time, first contact resolution, backlog and CSAT | Help desk lead |
| Monthly | Merge unused categories and update templates | Help desk lead |
| Monthly | Check roles and remove access for anyone who left | Admin |
How Tidio Helpdesk covers the checklist
Tidio Helpdesk puts email, live chat, Messenger, Instagram and WhatsApp conversations in one shared inbox, so steps 2, 6 and 9 happen on one screen. Tickets carry a status, a priority and an assignee, and agents leave internal notes. Here is where each setup step lives:
- Roles and departments (step 4): Settings > Team has Agents, Departments and Roles tabs. The Admin, Moderator and Chat Agent roles are built in, and custom permissions are available on Growth and Plus.
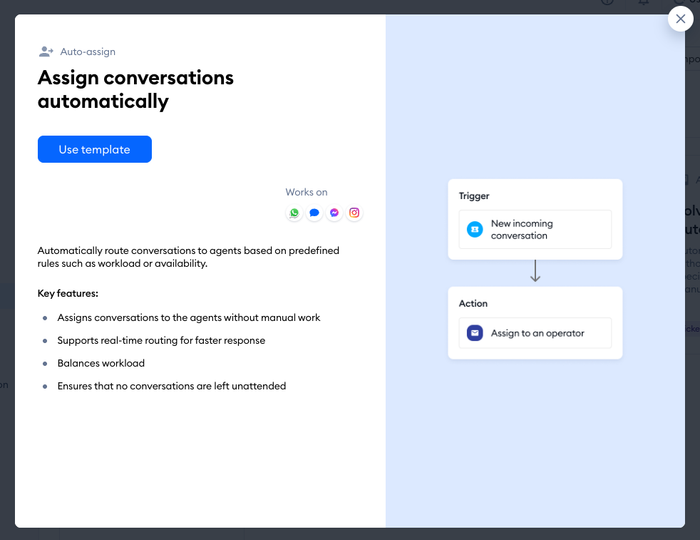
- Assignment (step 6): Settings > Workflows has an “Assign conversations automatically” template with load balancing or round robin. It applies to live chat, Messenger, Instagram and WhatsApp. Emails land in the Unassigned tickets folder.
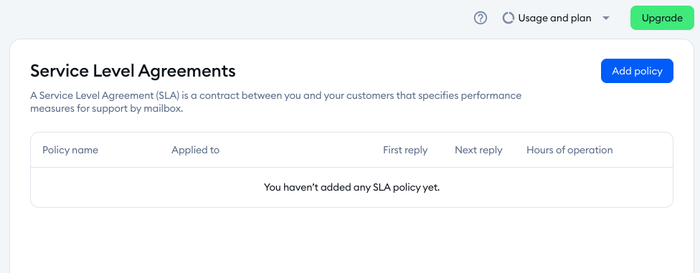
- SLAs (step 7): Settings > Service Level Agreements sets first reply and next reply times for tickets, per mailbox or source. The policies are internal, run on calendar hours and show a tag that tracks time left, paused or breached.
- Self-service and AI (step 8): Lyro AI agent can resolve up to 75% of support requests. Add your site and Q&A pairs as data sources, then check answers in the Playground before you switch it on.
- Feedback (step 12): Settings > Customer satisfaction turns on a rating after a live conversation or a ticket, including ones Lyro solves.
Tidio fits small teams and e-commerce stores that answer order questions all day. It is built around customer conversations, so an internal IT team should check it against its own requirements list from step 3 before choosing it.
Reply faster to tickets across all channels with Tidio
Where to start
Don’t tick all 12 boxes in one week. Begin with steps 5 and 6: agree categories, priorities and statuses, then route tickets by rule. Routing, SLAs and reports all depend on them. Then run the dry run in step 10 and put the weekly review on the calendar.
Frequently asked questions
A help desk checklist should cover scope, channels and hours, software requirements, roles, ticket labels, routing, SLA targets, escalation, self-service, ticket documentation, a test run, a regular routine and a feedback loop. The 12 steps above follow that order.
Start with scope and channels, then choose software against a requirements list. Set roles, categories, priorities and routing before you add agents, then write SLA targets and a handful of knowledge base articles. Test with real questions, launch, and review metrics after a month.
Record the requester, channel, category, priority, a one-line summary, steps already tried, order or account ID, the owner, the status, internal notes and the resolution. The aim is that any agent can pick up the ticket without asking the customer to repeat anything.
Yes, the same 12 steps apply. For an IT desk, scope covers access, devices and software requests, ticket records add device details and error messages, and the routine includes a monthly access review for leavers and joiners.
Check the queue daily, review SLA breaches and a sample of tickets weekly, and review metrics, categories, templates and access monthly. After any change to routing or SLAs, check the affected metric again a month later.
Start handling tickets in one inbox with Tidio